Overview
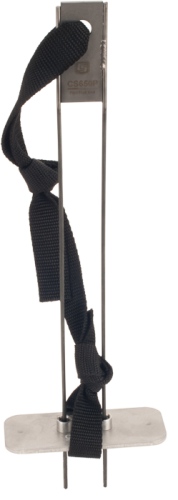
The CS650G makes inserting soil-water sensors easier in dense or rocky soils. This tool can be hammered into the soil with force that might damage the sensor if the CS650G was not used. It makes pilot holes into which the rods of the sensors can then be inserted. It replaces both the 14383 and 14384.
Images


Specifications
| Dimensions | 38.1 x 12.7 x 5.08 cm (15.0 x 5.0 x 2.0 in.) |
| Weight | 204.12 g (0.45 g) |
Articles and Press Releases
Newsletter Articles
Listed Under
FAQs for
Number of FAQs related to CS650G: 3
Expand AllCollapse All
-
If the soil is rocky, dry, or hard, Campbell Scientific recommends using a CS650G to make pilot holes before installing the sensor into the soil. When the soil is free of rocks, moderate to very wet, and relatively soft, then it is usually possible to install the sensor rods and keep them parallel by applying gentle and steady pressure on the sensor head.
Note: Never strike the sensor head with a hammer or step on the sensor head to force the rods into the soil.
-
The CS650 and CS655 work best when the rods are inserted into the soil as parallel to each other as possible. To make parallel pilot holes before installation, use the CS650G Rod Insertion Guide Tool. Minor deflection of a rod during insertion, such as when it contacts a small stone or root, may not affect the readings significantly, but major deflections may cause the CS650 or CS655 to operate outside of published accuracy specifications.
-
If the soil is rocky, dry, or hard, Campbell Scientific recommends using a CS650G to make pilot holes before installing the sensor into the soil. When the soil is free of rocks, moderate to very wet, and relatively soft, it is usually possible to install the sensor rods and keep them parallel using gentle and steady pressure on the sensor head.
Note: Never strike the sensor head with a hammer or step on the sensor head to force the rods into the soil.